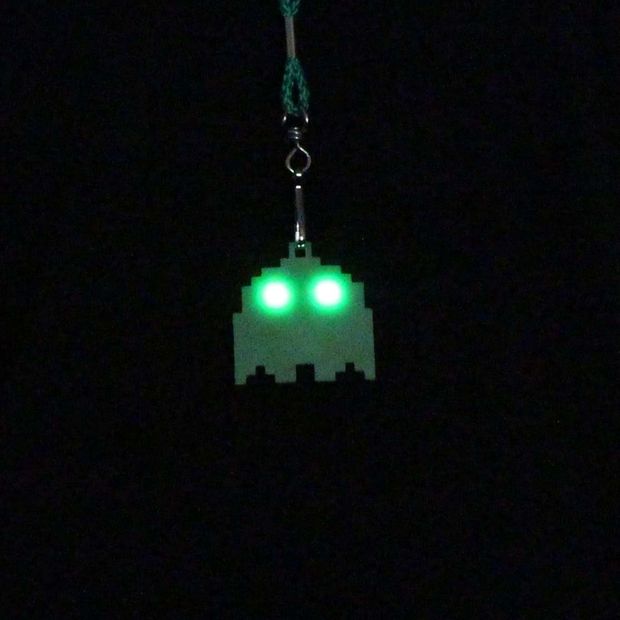
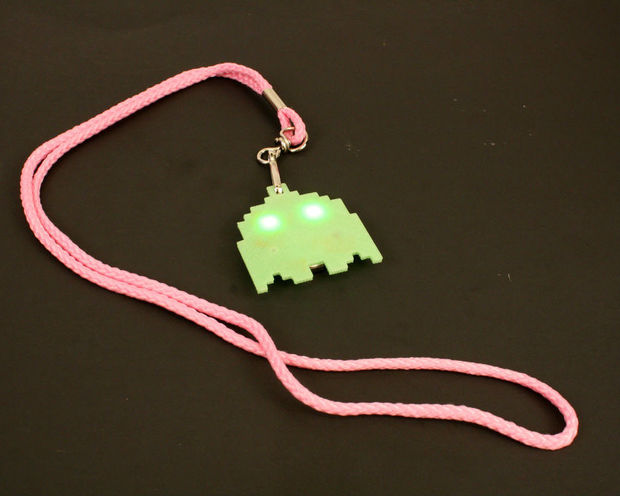
In this tutorial, we will show you how to make a 3D printed ghost with LED eyes. The ghost part can be printed with either the glow-in-dark or translucent PLA. The electrical circuit is printed with Electrifi Conductive Filament. The unique thing about this project is you can simply smush the Electrifi into the LED contacts using a soldering iron to complete the circuit. This project takes about 20 min. We include the components into two kits (Complete 3D Printed Ghost Pendent Kit and 3D Printed Ghost Pendant Kit Components) catering for users with and without access to 3D printers. We sincerely hope you will enjoy this project and learn a bit about electronics along the way!

All the materials and tools necessary for the project is listed below:
Consumables:
1) 1.75 mm Glow-in-dark or translucent PLA (-1 m, print time: 14 min);
2) 1.75 mm Electrifi Conductive Filament (-0.1 m, print time: 4 min);
3) Two 5050 SMD LEDs;
4) One CR2032 coin cell;
5) One CR2032 battery holder;
6) One lanyard;
7) Two pairs of M2x3 bolts and nuts;
Tools:
1) FDM 3D printer;
2) Soldering iron;
3) Tweezer;
Before going to the steps, watch the video below for a quick overview of this tutorial.
Step 1: 3D Print the Ghost with a glow-in-dark or translucent PLA.
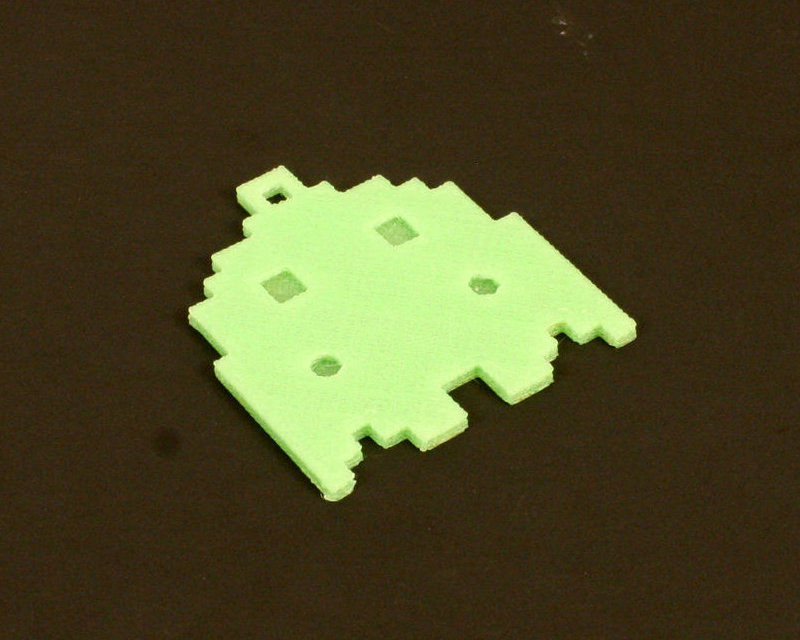
The stl file for the ghost is available from Multi3D's Thingiverse page. The print profile shows you what print condition we used to print the ghost.
Step 2: Glue the nuts into the holes of the 3D printed ghost.
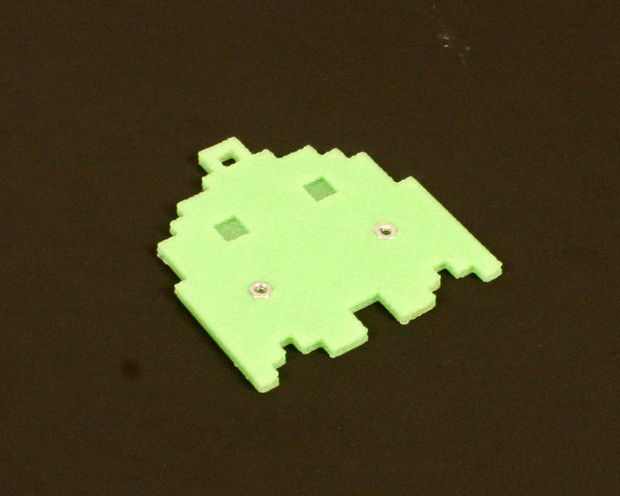
We use super glue that dries in 15 min. Add small droplets of super glue into those two small hexagonally shaped holes and place the nuts in. Use tissue paper to suck off the extra glue if necessary. Wait for 15 min or longer.
Step 3: Put down double sided tape in the space between the nuts and the eyes in the ghost in order to hold the 3D printed circuit in place.
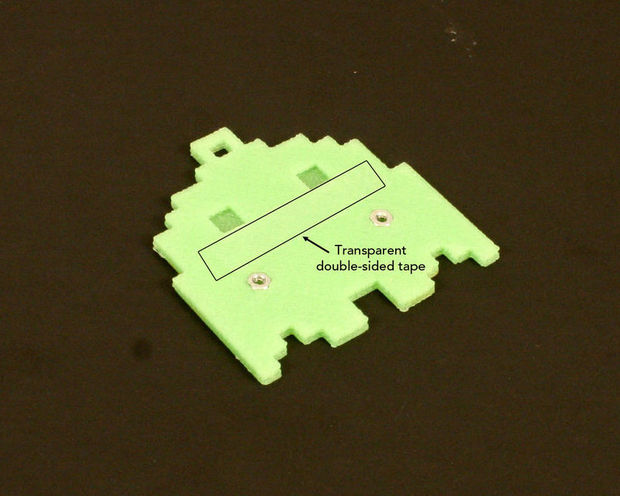
Cut a piece of 3.5 cm long double sided tape and place in between the square LED holes and the hexagonal nut holes. You may need to cut the tape lengthwise if it is too wide causing it to cover either the LED holes and/or the hexagonal nut holes.
Step 4: Print the conductive traces with Electrifi Filament.
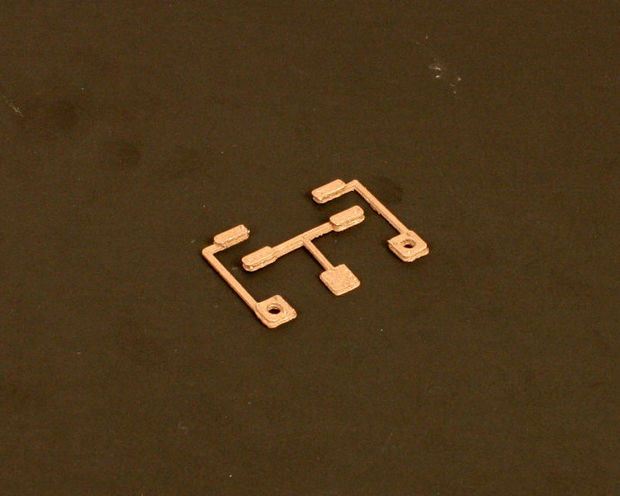
We print the traces onto a piece of polypropylene stuck to the printer bed with double-sided tape so that the circuit can be easily removed from the substrate. You can easily remove the Electrifi Circuit pieces by flexing the polypropylene substrate and picking the pieces off with tweezers. The stl file and print profile for the conductive traces can also be obtained from the above link to Multi3D's Thingiverse page. In Cura, make sure to adjust the z-offset value to the thickness of the polypropylene sheet that you will use. Please refer to this tutorial for more details on printing with Electrifi Filament.
Step 5: Place the conductive traces onto the back of the 3D printed ghost.
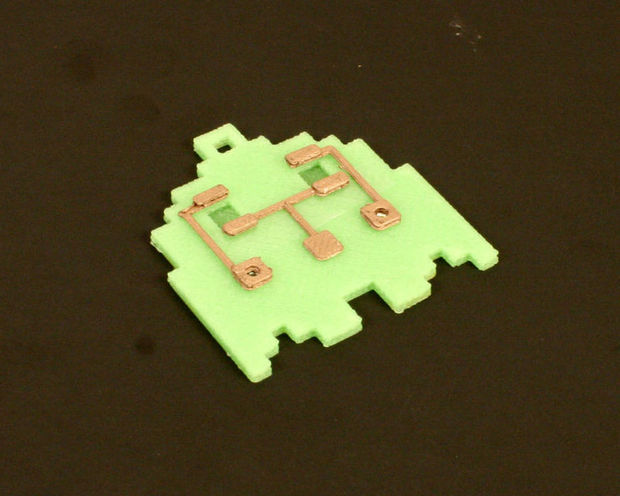
You want the holes in the traces to line up with the holes in the nuts, and the taller pads of the traces to bracket the square holes for the LEDs. Gently press down the traces in the areas where the tape lies so that the traces can adhere to the ghost.
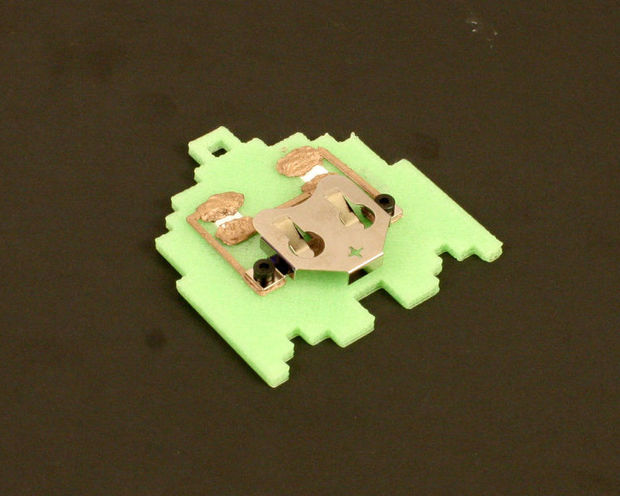
Step 6: Screw the Coin cell battery holder onto the ghost.
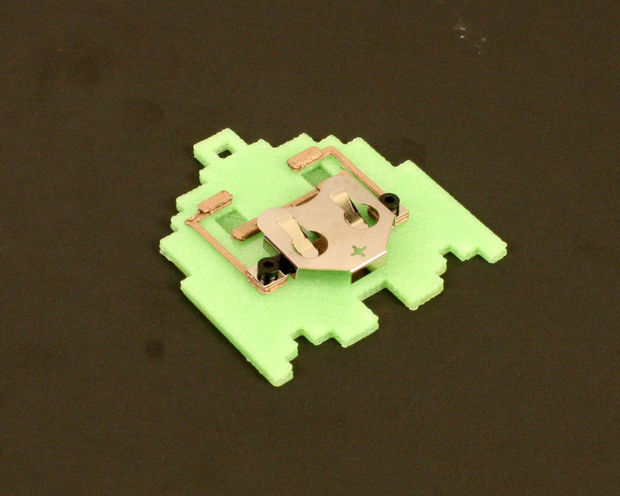
Line up the two holes from the battery holder to the holes of the traces and then insert and tighten the M2x3 screws to the ghost.
Step 7: Place the LEDs into the square holes.
The front side of the LEDs goes to the bottom of the square hole while placing the LEDs. Make sure you match the polarity of the LEDs with the polarity of the battery. In the end, the metal leads of the LEDs should be oriented with the positive leads on the top and the negative leads on the bottom.
Step 8: Carefully smush the Electrifi filament from the pads down onto the metal leads of the LED while pushing down onto the LED with tweezers.
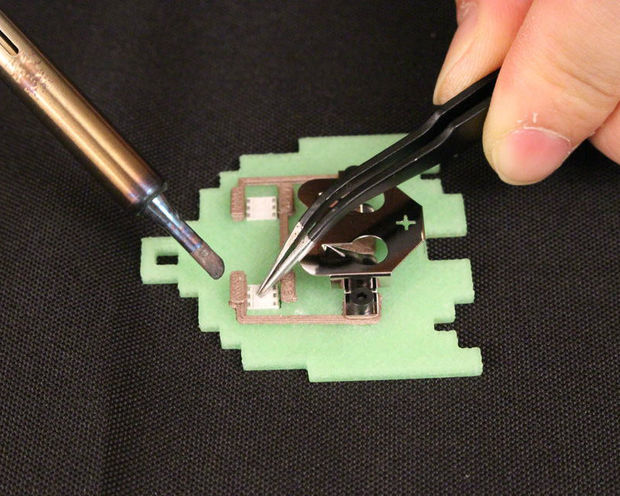
Use a soldering iron to smush the Electrifi filament from the pads down onto the metal leads of the LEDs. In this case, a flat tip of the soldering iron works better than a needle shape. Try to smush the Electrifi relatively quickly and only so much as to cover the metal leads of the LED. Be careful not to create a short circuit between the two Electrifi pads by smushing them together.
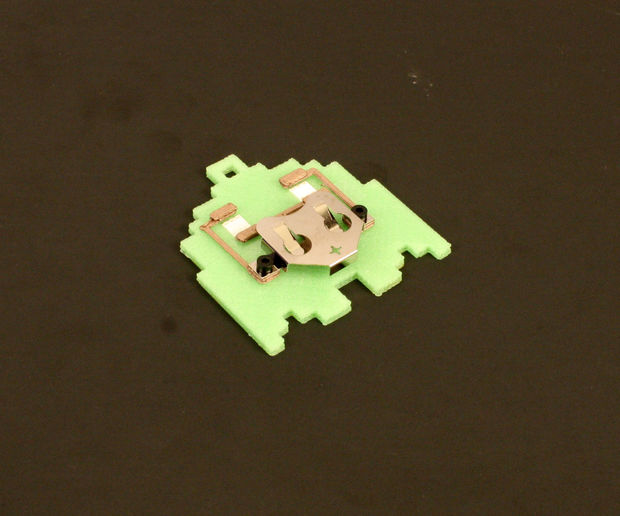
Step 9: Insert a coin cell battery into the battery holder.
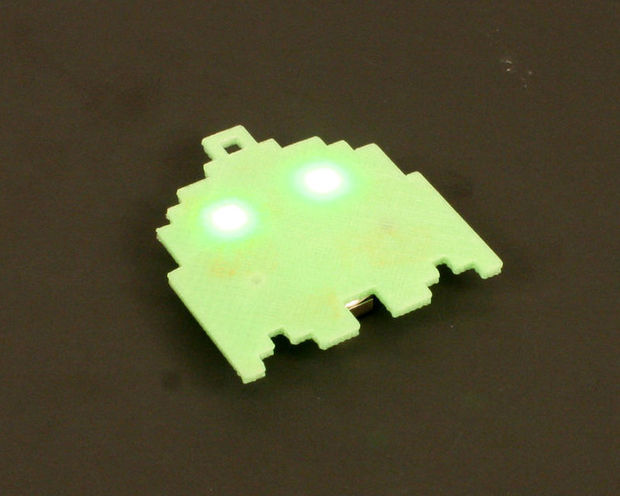
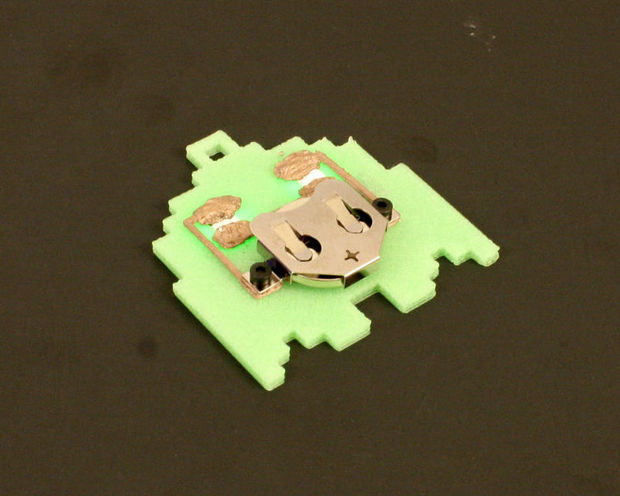
Slide the coin cell from the top and with the positive side facing toward you. The conductivity of the traces is poor while it is still hot. So, let it cool down completely and you will see the LEDs light up.
Step 10: Clip a lanyard onto the ghost.
Step 11: Wear it.
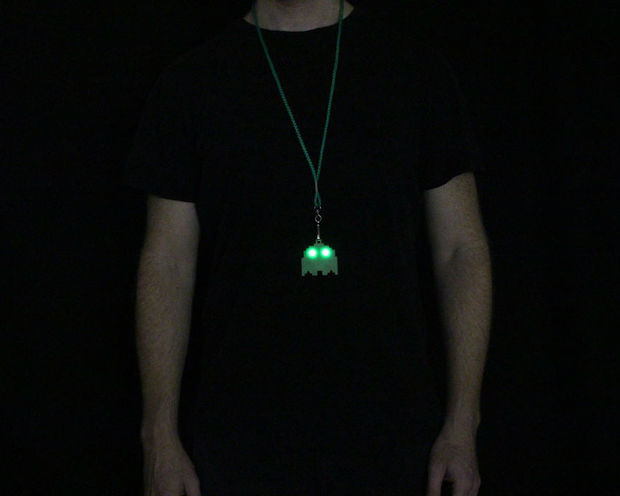
Congratulations! It is time for Trick-or-Treat!!!
Follow us on Youtube or Twitter: